Official Assignment Description:
'* 3D scan an object
- extra credit: make the scanner
* design and 3D print an object (small, few cm)
- extra credit: edit and print an object that you scanned'
The potential for this week's assignment seemed huge! Until we learned the myriad pitfalls of 3D Printing and Scanning. So I scaled my dreams back and settled on 3D printing a propeller (which can be difficult to make via other methods) and 3D scanning a clay hippo named Henrietta (I just thought this would fun...and a nice exercise in working with .stl meshes). Below is my proces.
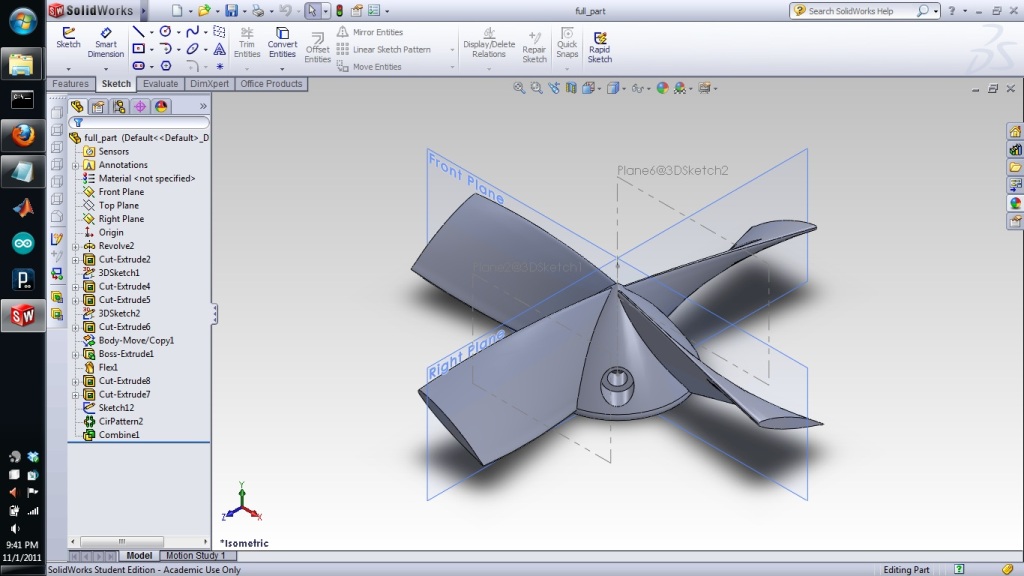
Step 1: Come up with a design that takes advantages of the unique strengths of the 3D printing process (e.g. able to fabricate
complex and interlocking geometries that aren't well suited to molding and casting). I've been wanting to make a propeller for a custom
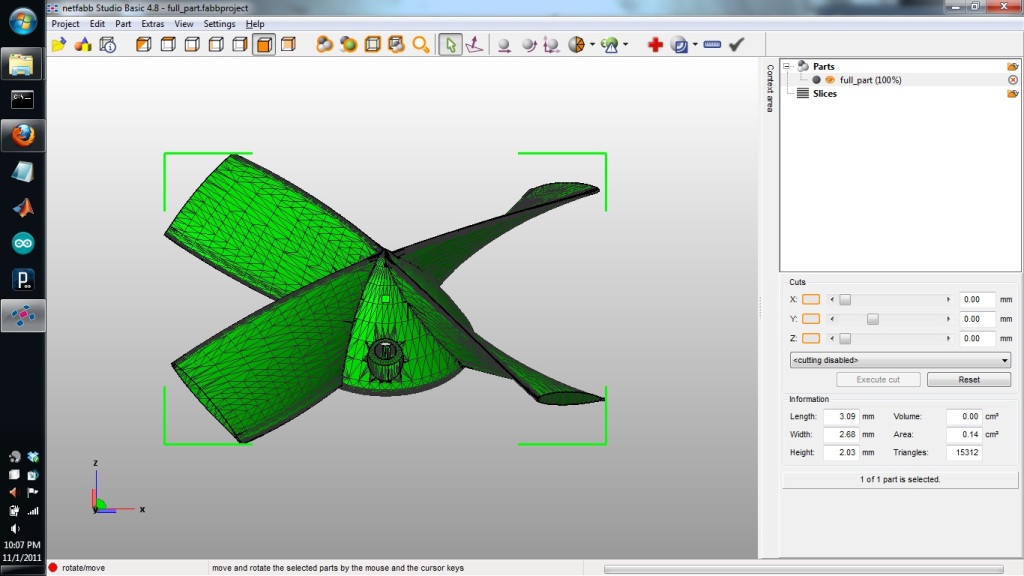
electric ducted fan, and this seemed like an ok project. Make the design in SolidWorks (left) and export as .STL format (right).
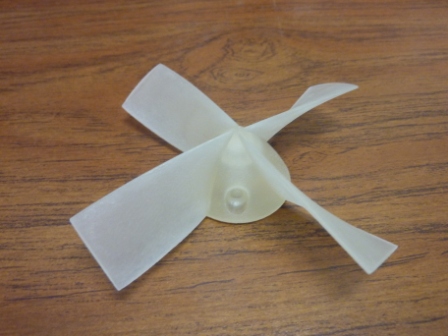
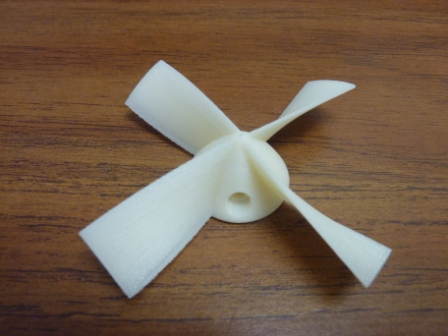
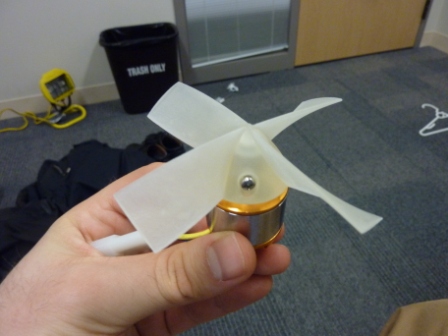
Step 2: Send .STL to Tom for printing in Acrylic (left) and ABS Plastic (right). They even fit on one of my motors!
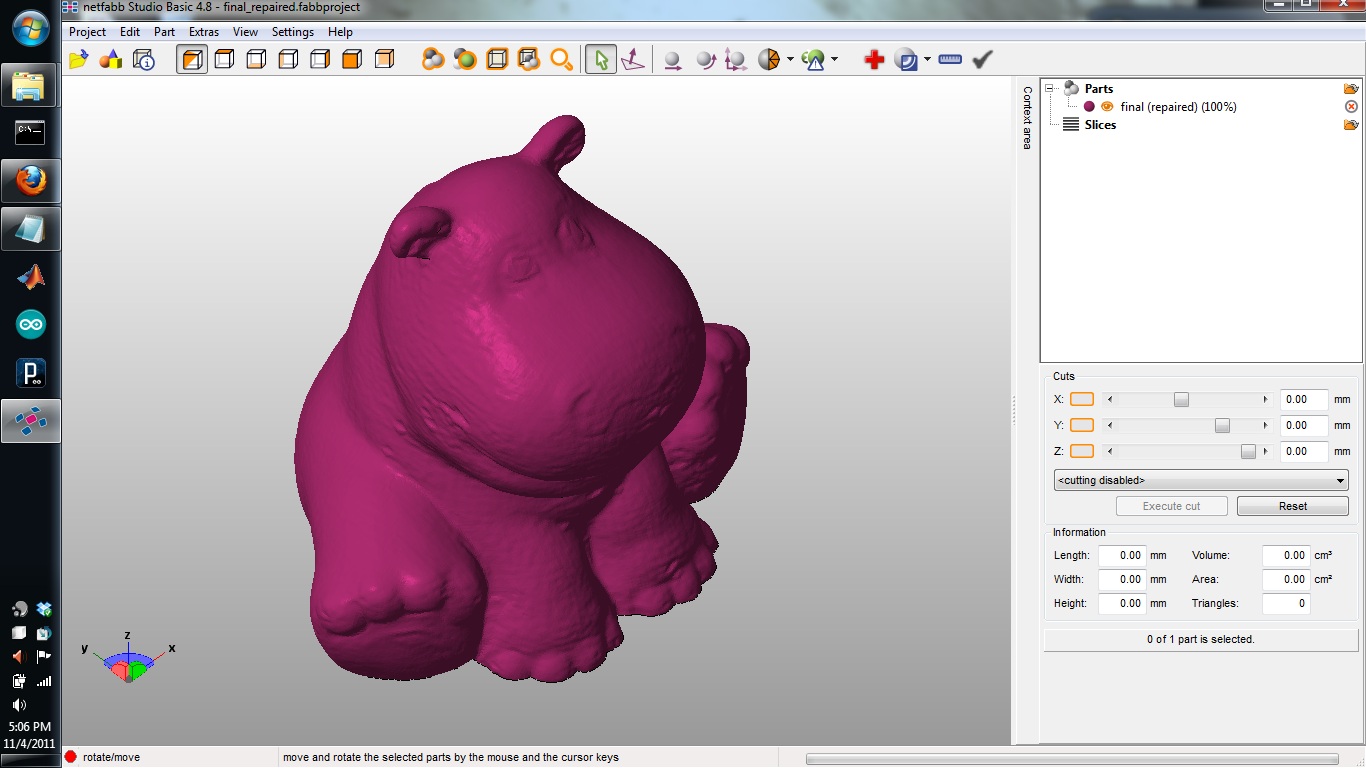
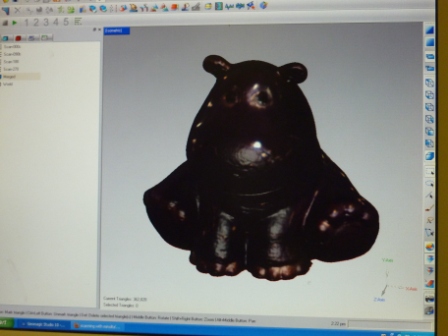
Step 1: Find something fun to scan. Henrietta the Money-Saving Hippo (piggy bank) seemed like a nice object.

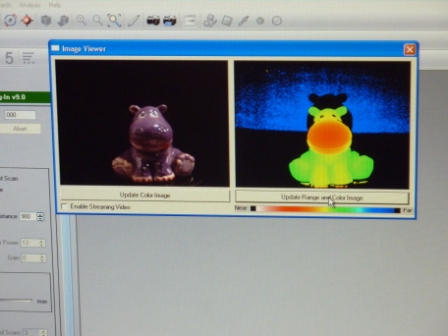
Step 2: Use Minolta 3D scanner and accompanying software to scan and combine images. From left to right:
Setting range in camera; Henrietta before cleanup; Henrietta after cleanup.
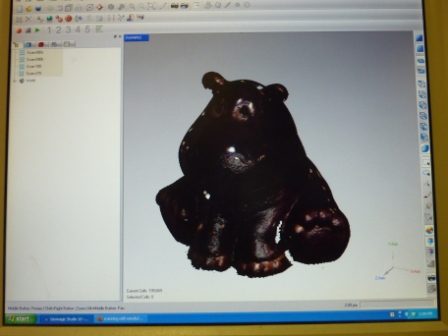
Step 3: Do final editing. I used a free program called Netfabb